RAID 0以外のRAIDモードで使用中のドライブを交換する
RAID 0以外のRAIDモードで使用中のドライブが故障した場合、故障したドライブの交換後、RAIDアレイを修復する作業が必要です。
故障したドライブを交換するには、以下の手順を行ってください。
1 故障したドライブを交換する前に本製品に保存されているデータを別のドライブにバックアップします。
交換作業中に別のドライブが故障しデータが取り出せなくなる可能性があるため、データは事前に必ずバックアップしてください。
2 ドライブエラーランプが赤色に点灯しているドライブのつまみを押します。
本製品の電源がOFFの場合は、故障したドライブの番号を、メール通知機能で送信されたメールで確認してください。
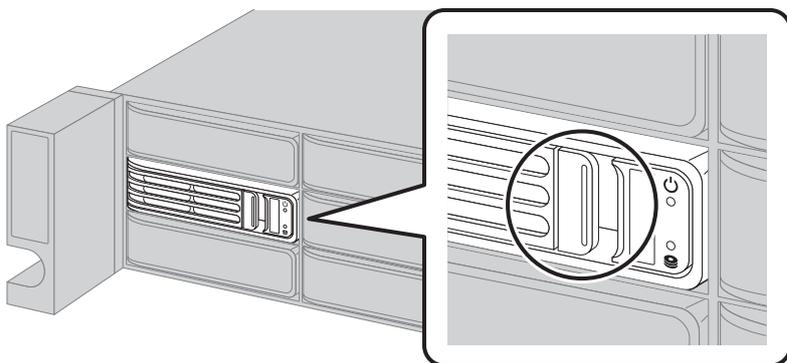
Diagram showing the drive bays of a RAID unit. A circular callout highlights a specific drive bay where the error lamp is lit up in red, indicating a drive that needs to be replaced.
3 カートリッジごとドライブを手前に引き出し、抜きます。
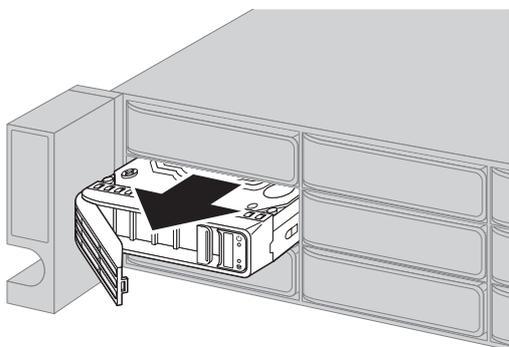
Diagram showing a drive being pulled out from its bay. A large black arrow points to the handle on the front of the drive, indicating the direction to pull it out.
4 別売のドライブを、取っ手が開いた状態で空のスロットに差し込みます。
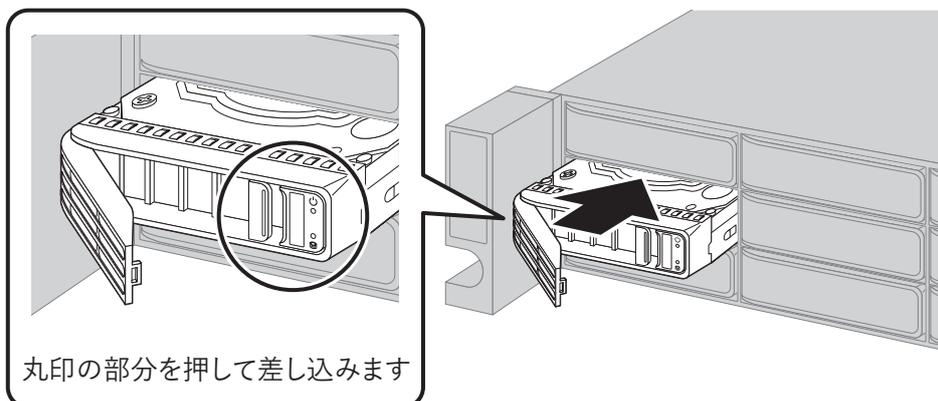
Diagram showing a new drive being inserted into an empty bay. A circular callout on the left shows a close-up of the drive's handle, with a circle highlighting the latch area. A large black arrow on the right points to the drive being pushed into the bay. Below the callout, the text '丸印の部分を押して差し込みます' (Push the circled part to insert) is present.
丸印の部分を押して差し込みます