Screenshot of the 'サイボウズ ネット連携サービス' (Cybozu Net Integration Service) page. The '追加する' (Add) button is highlighted with a red box. Below it, a table lists content items: ニュース (News), サイボウズからのお知らせ (Cybozu Announcements), and 企業検索 (Company Search), each with '変更する' (Change) and '削除する' (Delete) links. A '反映する' (Reflect) button is visible at the bottom.
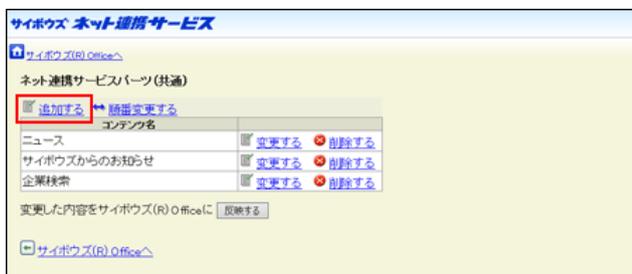
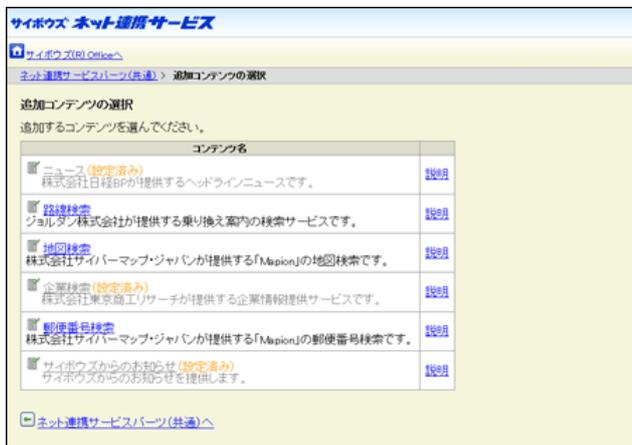
5. 追加するコンテンツ名をクリックします。
設定済のコンテンツはグレー表示されます。
Screenshot of the '追加コンテンツの選択' (Select Additional Content) page. It shows a list of available content with checkboxes. 'ニュース (設定済み)' (News - already set), '企業検索 (設定済み)' (Company Search - already set), and 'サイボウズからのお知らせ (設定済み)' (Cybozu Announcements - already set) are checked and grayed out. Other options like '路線検索' (Route Search), '地図検索' (Map Search), and '郵便番号検索' (Zip Code Search) are available.
6. 手順5で選択したコンテンツの詳細を設定し、追加する をクリックします。

Screenshot of the 'コンテンツ情報の設定 (路線検索)' (Set Content Information (Route Search)) page. The '追加する' (Add) button is highlighted with a red box. There is a checkbox for '表示内容' (Display content) and a 'キャンセルする' (Cancel) button.
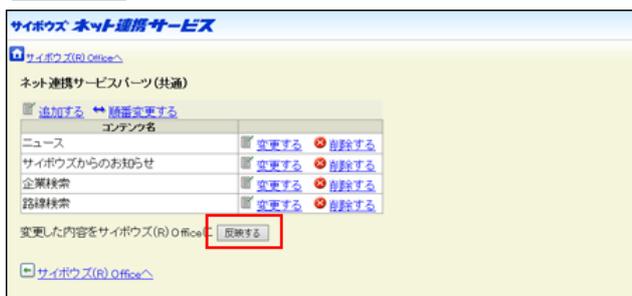
7. 反映する をクリックします。
Screenshot of the 'サイボウズ ネット連携サービス' page. The '反映する' (Reflect) button is highlighted with a red box. The table shows the same content items as in the first screenshot.
8. サイボウズ Officeへをクリックします。
9. 「ネット連携サービスの設定」画面で、設定する をクリックします。
コンテンツの設定を変更する
「ネット連携サービス(共通)」パーツに設定しているコンテンツの情報を変更します。
 ネット連携サービス をクリックします。